


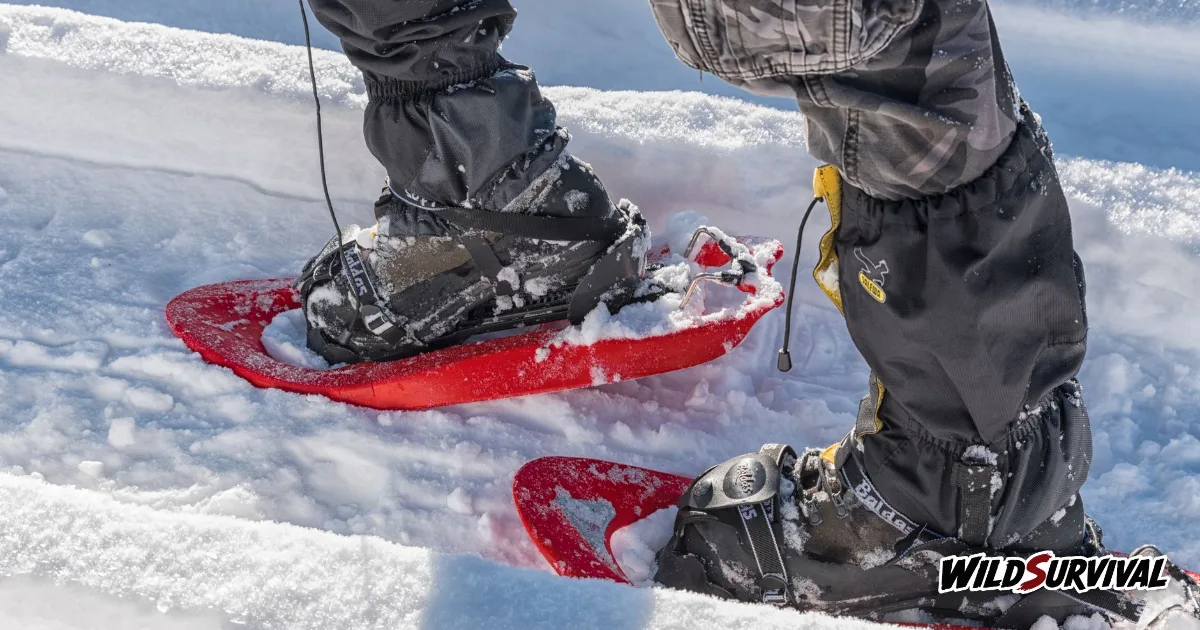
Snowshoeing for the first time is easiest on a marked trail or groomed snow, with snowshoes sized to your weight once you are dressed and packed, and poles fitted with wide snow baskets. Walk with a normal stride, lifting each shoe over the other, flip the heel lifts up on climbs and fold them down on side slopes. Before you head off marked routes, read the avalanche forecast for the range, and keep your first outings short.
Sizing snowshoes to your loaded weight
A snowshoe has to spread your full weight across the snow, so that weight includes everything you carry. In its guide to snowshoe sizing, the American brand MSR asks you to add your body weight, the clothing and boots you wear on most of your snowshoeing trips, and your usual pack. For a simple day on the trail, it suggests adding 10 to 15 lb, which works out at 4.5 to 6.8 kg.
The snow matters as much as the scales. On packed snow, MSR puts almost everyone on its shortest size, while soft and deep snow calls for more surface area. Here is its quick reference chart, converted to kilograms and centimetres:
| Loaded weight | Packed snow | Soft snow | Soft, deep snow |
|---|---|---|---|
| 41 to 57 kg | 56 cm (22 in) | 56 cm | 64 cm, or 56 cm with tails |
| 57 to 79 kg | 56 cm | 64 cm or 56 cm | 64 cm, or 56 cm with tails |
| 79 to 102 kg | 56 cm | 64 cm, or 56 cm with tails | 76 cm (30 in) with tails, or 56 to 64 cm with tails |
| Over 102 kg | 56 or 64 cm | 56, 64 or 76 cm with tails | 76 or 64 cm with tails |
Tails are extensions that clip onto the back of some models to add flotation when the powder is deep or the pack is heavy. MSR says the vast majority of people are well served by a 56 or 64 cm pair plus tails. It also notes that its women’s snowshoes are about three-quarters of an inch narrower, roughly 1.9 cm, for a more natural gait, with only a minimal difference in flotation.
Bindings, heel lifts and crampons
The binding holds your boot on a hinge that lets the heel rise as you walk. For large boots and chunky winter footwear, MSR recommends strap bindings, because they offer the widest range of adjustment. Always try a pair on with the boots you will actually wear.
The heel lift is a small bar that flips up under your heel. Xavier Argeles, who writes for the French snowshoeing site Randozone, explains that it raises the back of the foot so the foot stays level, and that on a steep slope it makes progress much easier. He also suggests testing the crampons, blades and teeth under your snowshoes on hard snow and steep climbs before you depend on them.
Your boots should be waterproof, as should your gloves, according to Randozone. A pair of gaiters keeps snow out around the ankle, and our article on hiking gaiters explains how they fit over a boot.
More articles on WildSurvival
- Tent Condensation: Why It Forms and How to Reduce It
- Tour du Mont Blanc: Route, Huts and Wild Camping Rules
- How to Wash and Reproof a Waterproof Jacket
Poles and snow baskets
Poles are not essential for snowshoeing, Randozone says, but they help you keep your balance, especially in deep snow. Your summer trekking poles will do, as long as you swap the tip for a wide basket that stops them sinking.
Set their length on flat ground before you start, then adjust it for climbs and descents. Our guide to setting the length of trekking poles covers those adjustments, which carry over to the snow. Randozone adds that you should be able to handle your poles easily, so practise planting them and changing their length with gloves on before you need to do it on a slope.
Snowshoeing technique on the flat, uphill, downhill and across slopes
On flat ground, most beginners instinctively spread their legs wide to stop the shoes overlapping. In his article on how to walk in snowshoes, Argeles describes that gait as very tiring after a few hours, and prefers walking normally while lifting each snowshoe so it passes over the other. Keep your heel free on the flat and on the way up.
Going uphill, flip the heel lifts up as soon as the slope steepens. Going downhill, Randozone explains that it can sometimes be better to lock the back of the snowshoe, particularly when you want to move quickly, to protect the hinge. On a side slope, fold the heel lift back down, because it makes you much less stable when the ground tilts sideways.
Falling is part of learning snowshoeing. Randozone points out that the binding hinge does not like being twisted, and recommends practising getting up from the snow on an early outing, somewhere safe, so you know what to do when it happens further from the car park.
Where to go on your first snowshoeing trips
Randozone’s beginner advice, in its guide to starting out on snowshoes, is to begin on a marked area, since some Nordic centres open routes reserved for snowshoes. Ski resorts work well too, because groomed snow means you sink less. Pick a walk with little height gain and no side slopes, so your first hours of snowshoeing go into finding a rhythm.
The same guide says not to go too far or for too long at first, then to build up the length of your outings over the winter. Do not go alone, know the ground you are walking on and do not overestimate yourself. Snow slows you down, and winter daylight runs out early, so leave a comfortable margin.
Avalanche danger and the forecast
Away from marked routes, the regional avalanche forecast becomes essential reading the evening before. Forecasters across Europe grade the danger on the European avalanche danger scale published by the European Avalanche Warning Services, which runs from 1 Low through 2 Moderate, 3 Considerable and 4 High to 5 Very high.
The EAWS describes level 3, Considerable, as dangerous avalanche conditions in which triggering is possible even from low additional loads, especially on steep slopes. It is forecast for around 30% of the winter season and accounts for around 50% of avalanche fatalities. Level 2, Moderate, is forecast for around half the season and accounts for around 30% of fatalities, with triggering possible mainly from high additional loads.
For a beginner, the conclusion is straightforward: without avalanche training, stay on marked snowshoeing routes. Randozone also warns about the higher risk after heavy snowfall and during the thaw. Our guide to winter camping on a cold night shows how mountain forecasts often split the danger by altitude.
What to wear and carry
Randozone suggests a three-layer system: a long-sleeved top, a light down jacket, thicker if it is very cold, and a windproof jacket. It adds that there is no need to spend much to get started, as long as you bring a genuinely warm layer. Our article on the layering system for hiking explains what each layer does.
Never set off without a pack: water, food and that windproof jacket at the very least. Randozone notes that cold, dry air dehydrates you without you noticing, and that the tube of a hydration bladder can freeze, which an insulated sleeve or a flask avoids. Pack sunglasses and a higher-factor sun cream than you would use in summer, as the same site recommends.
Hiring or buying your first pair
If you are not yet sure snowshoeing is for you, hire a pair for the first outings and use the MSR chart to check that the size you are handed matches your loaded weight. When you decide to buy, try the bindings with your own boots, check that the heel lift flips up and down easily with gloves on, and look closely at the crampons under the deck.
On easy marked routes, a simple pair does the job. Spend your money first on the things that keep you warm and dry, such as waterproof boots and gloves and a proper warm layer, then upgrade your snowshoeing kit once you know which kind of terrain draws you back.
Common snowshoeing mistakes
Put together, the advice from MSR, Randozone and the EAWS points to a short list of beginner errors. Most of them can be fixed before you even strap in.
- Sizing your snowshoes on body weight alone, without clothing, boots and pack.
- Walking with legs splayed for hours, which Randozone finds very tiring.
- Leaving the heel lift up on a side slope, where it throws you off balance.
- Going alone, too far or for too long on the first trip.
- Forgetting to drink because it is cold, when dry air dehydrates you.
- Leaving marked snowshoeing routes without reading the avalanche forecast.
Your first snowshoeing day, step by step
| Stage | What to do |
|---|---|
| The evening before | Marked route, little climbing, no side slopes; avalanche forecast read if you plan to leave the markers |
| Kit | Snowshoes sized to your loaded weight, poles with wide baskets, waterproof boots |
| Pack | Water, snacks, windproof jacket, warm layer, sunglasses and sun cream |
| On the snow | Normal stride lifting each shoe, heel lifts up on climbs, folded down across slopes |
| Length | Short, with company, building up trip by trip |
For your first day, focus on three things: snowshoes in the right size, a natural stride and a route chosen for your level. Hire a pair if you are still unsure, stay on marked snowshoeing trails until you have done some avalanche training, and let your trips grow as your confidence does.