


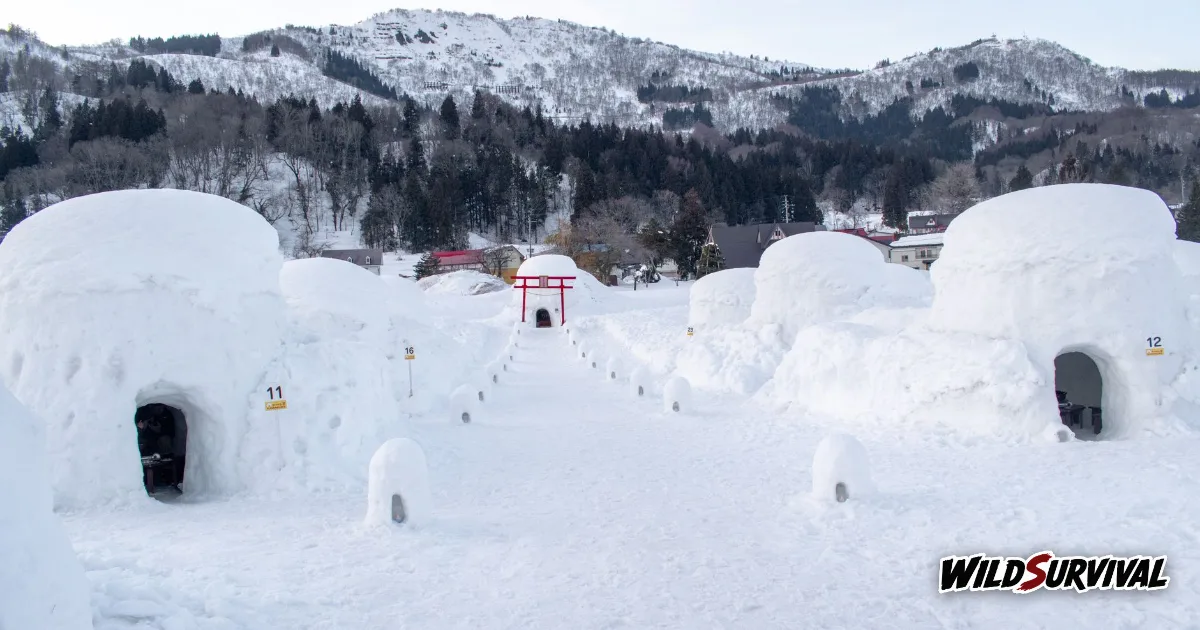
A quinzhee snow shelter is a dome of loose snow that you pile up, leave to harden for a few hours, then hollow out from the inside. Canadian outdoor magazine Edge North calls for walls at least 20 centimetres thick, a vent hole at the top and a sleeping platform set higher than the door. All it takes is a shovel and a handful of sticks, which is why it works in forest snow that is far too soft to cut into igloo blocks.
Why a quinzhee snow shelter beats an igloo in the woods
The snow decides which shelter you build. British bushcraft instructor Paul Kirtley sets this out in his piece on why he doesn’t build igloos in the forest. Igloos belong to open, barren ground, where wind tumbles the snow and packs it into windslab hard enough to cut into blocks. Under trees, the snow stays light, fluffy and loose, and you simply cannot cut blocks from it.
That is where the quinzhee snow shelter comes in. Kirtley describes it as snow piled into a mound and compacted, left to freeze like half a giant snowball, then dug out and hollowed. A snow cave, which Kirtley mentions digging in the mountains, is carved straight into snow that is already lying deep on the ground. The quinzhee builds its own volume, so it works where the snowpack is too thin for a cave.
Speed is the other argument. Kirtley recounts building a block igloo with a mould at minus 15 to minus 20 Celsius: his team produced about half a dozen usable blocks per hour, and the shelter took several days. Edge North puts it more bluntly, calling the quinzhee way easier to build than an igloo.
Picking the spot and piling the snow
Edge North’s step-by-step guide to building a quinzhee from a pile of snow is the backbone of what follows. Start by marking out a circle of undisturbed snow 2 to 4 metres across, depending on how many people the quinzhee snow shelter has to sleep. Keep clear of branches loaded with snow overhead, and pick ground that is roughly flat and close to your camp.
Then pile the snow into a dome about two metres high. The guide stresses mixing: stir the snow or fling it onto the pile, break up any blocks, and avoid icy layers, which weaken the roof. A backcountry shovel does most of the work, though a pot or a bucket will do in a pinch.
The job goes faster with two people: one shovels snow onto the pile while the other mixes it and pats the sides of the dome lightly into shape. Start early in the day, since the setting time comes on top of the digging time. If evening arrives and your quinzhee snow shelter is still a heap of loose snow, pitch the tent for the first night. Our guide to preparing for a winter night out covers the sleep system, ground insulation and cold management that apply just as much under snow.
Size the inside before you start. Edge North suggests a shelter big enough to undress sitting up without touching the walls, and warns that larger interiors take longer to warm up. For one or two people, a snug quinzhee snow shelter that your body heat can actually warm is the better choice.
More articles on WildSurvival
- Stevenson Trail: Walking the GR70 With or Without a Donkey
- Microspikes: Choosing Winter Traction for Icy Trails
- Bushcraft Notches: The Basic Knife Cuts and Their Uses
Letting the snow set before you dig
Stirred snow needs time to bond again. Edge North says to let the pile harden for at least two to three hours, adding that colder air or a longer wait makes it harder. When it isn’t an emergency, the magazine recommends leaving the pile overnight for strong walls.
Use the wait to set your depth gauges. Cut several sticks about 30 centimetres long and push them two-thirds of the way into the pile, spaced evenly over the whole dome. Once you start digging, every stick end that shows up inside tells you the wall has reached the right thickness at that spot.
The guide says the method works best at minus 15 Celsius or colder, in relatively dry air. Under those conditions a good quinzhee snow shelter can last for weeks, until the temperature climbs above zero.
Hollowing out the quinzhee snow shelter
Dig a low entrance at ground level, just big enough for one person to crawl through. From there, Edge North tells you to hollow upward first, which takes weight off the roof early and reduces the snow load hanging over your head, and to scrape the lower walls and floor last.
Stop digging the quinzhee snow shelter as soon as a stick shows. The guide sets a minimum of 20 centimetres for the walls and warns that thin, weak walls are dangerous and won’t hold heat. Leave around 15 centimetres of packed snow on the floor as well.
Carve the sleeping platform above the level of the entrance. Cold air is heavier, so it drains down into a cold well below your bed and leaves the warmer air around you. Edge North lists spruce boughs, dry grass or a caribou skin as insulation between you and the snow, and on a hiking trip your sleeping mat does that job.
Finish by smoothing the ceiling with a gloved hand. A smooth surface stops meltwater from gathering into drip points that land on your sleeping bag in the night.
Vent, door and the night inside
Poke a small vent hole through the top of the dome for fresh air. Edge North gives no diameter for it. Check that it is still open before you sleep and after any snowfall, because a blocked vent does nothing.
To keep the heat in, the guide suggests closing the entrance with a block of snow, a sheet of plywood or a blanket. Kirtley describes blocking his igloo door with a daypack to limit the cold air coming in overnight. Either way, the vent at the top stays clear.
Mark the quinzhee snow shelter on the surface so nobody walks over the roof, and keep a shovel inside with you. If it snows hard during the night, you can dig the entrance out from within your quinzhee snow shelter.
Carbon monoxide and cooking near your quinzhee snow shelter
A closed shelter and a lit stove are a risky pairing. Danish doctors Simon Uhl Nielsen and Anders Karlsen measured carbon monoxide in five newly built emergency snow caves in northeastern Greenland, using an MSR Whisperlite to melt snow. Their 2024 field study in Wilderness & Environmental Medicine recorded peaks of up to 120 ppm during the priming phase, and time-weighted averages of 14 to 67 ppm over trials lasting 15 to 21 minutes.
In one trial with a dirty burner, levels rose up to tenfold. The authors conclude that single, short cooking sessions with less than 10 minutes of burn time may be tolerated under specific conditions, while stressing how much the caves varied from one to the next.
The safest habit is to cook and melt snow outside the entrance, then crawl back in with your hot drink. Our article on the poisoning risk of a fire in an enclosed shelter covers the warning signs, and our method for melting snow to drink safely works just as well at a winter camp.
Staying dry while you build
Digging is hard work, and sweat turns cold the moment you stop. A reader commenting on Kirtley’s article suggests wearing as little as possible under your shell while you excavate. Keep a set of dry layers deep in your pack and change into them once the work is done.
Before you settle in, lay out what you need within reach: headlamp, shovel, an insulated bottle, and your boots in a bag so they don’t freeze solid. Kirtley also quotes the Manitoba Museum on Inuit practice, where clothing was cleaned of snow before entering so it would not melt inside.
Once you lie down, keep your head on the side of the vent and your headlamp within reach. In the morning, crawl out and check the dome and the vent of your quinzhee snow shelter before you pack your sleeping bag away.
When a quinzhee snow shelter is the wrong call
The sources draw the limits of this shelter fairly clearly. Edge North places the best conditions at minus 15 Celsius or colder in dry air, and says a good quinzhee lasts until temperatures rise above zero. A thaw, heavy wet snow or forecast rain takes away most of its value, and the roof becomes harder to trust.
On a wind-scoured plateau where the snow has packed into hard slab, Kirtley’s account shows that an igloo becomes possible, because the snow cuts into blocks. On a deep snowpack that is already in place, a snow cave saves you the piling. The quinzhee snow shelter keeps its edge in the forest, on light snow, when you have an afternoon ahead of you and a shovel in your pack.
Time matters too. With at least two to three hours of waiting before you can dig, this is a shelter you start in the early afternoon. Begin it at dusk and you will spend the night in the tent anyway.
Quinzhee snow shelter checklist
| Step | What the sources give |
|---|---|
| Site | Circle of undisturbed snow, 2 to 4 metres across |
| Pile | About two metres high, mixed snow, no icy layers |
| Setting time | At least two to three hours, overnight if you can |
| Gauges | Sticks about 30 centimetres long, pushed in two-thirds |
| Walls | At least 20 centimetres, packed floor of about 15 centimetres |
| Inside | Bed above the door, smoothed ceiling |
| Air | Vent at the top kept open, cooking done outside |
Build your first one close to the car or a hut on a day with deep snow and dry cold, before you rely on it far from help. Give yourself plenty of time, because the pile, the wait and the digging easily fill a whole day.